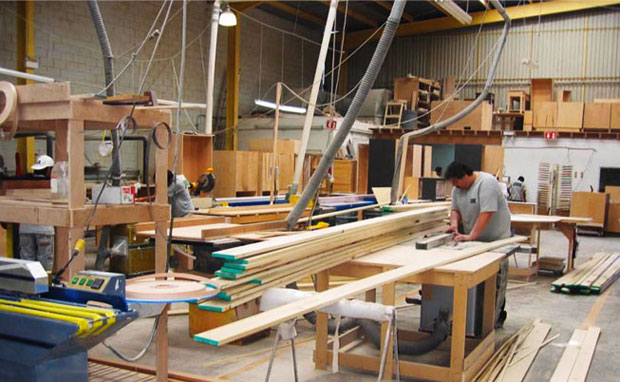
Beautifully finished wood products are a joy to behold! They create a sense of warmth and passion for the erudite observer with their richness, depth, and luster. Ugly finishes...well, that's a different story! Bradco has a very close relationship with Columbia Forest Products, being their Pure Bond Fabricator Network. We only use the urea formaldehyde free Purebond Plywood from them for the custom cabinetry that we build. Read more about wood works from Columbia Forest Products.
Why do finishes sometimes turn out ugly?
Fine wood finishes require not only a systematic process and precise recipe, but also a level of artistry. Accomplishing such a finish additionally requires proper and absolutely necessary wood surface preparation. Ugly finishes typically result when shortcuts omit some aspects of this in an attempt to reduce costs, increase efficiency, or both.

Wood is a remarkable material. Due to it's organic structure, it has all kinds of avenues for a stain or dye to penetrate, including pores, vessel elements or vascular tracheids (depending on whether the species is of the hardwood or softwood group), and various types of wood cells. It is the penetration of the stain, sealing coat, and subsequent top coats into these structures that gives the finished product its appearance of depth. Generally speaking, these openings tend to be oriented in the direction of the grain, allowing stains or dyes to penetrate in a somewhat naturally controlled manner. However, when these openings are concentrated and oriented towards the surface, things start to get a little tricky. This most frequently occurs in the presence of figure, including wavy grain, curly grain, mottled grain, or grain deviation in proximity to knots. When this happens, the openings of the vessels, pores, and cells effectively form a pipeline for stain to penetrate deeper and less consistently. It is important to remember here that wood without figure is the exception - not the rule.
All the above are serious considerations in dealing with any decorative wood component, including solid doors, face frames, or anywhere solid wood is used, and they also apply when decorative panel products, or hardwood plywood, are used.

Faces for hardwood and decorative softwood plywood also present unique challenges. They are thinly cut either on a lathe (rotary cut) or a slicer (plain sliced, quarter sliced) and spliced together side to side to create a 48" width. The most common form of pairing veneers from a given log is book matching, which requires turning over every other leaf of veneer to provide a flowing mirror image at the veneer joints. The downside of this practice is that the tight side of the veneer has different absorption attributes than does the loose side. (See Volume 2, Finishing Challenge: The Barber Pole Effect).
In addition to natural variation in wood, other factors that affect finish include insufficient or improper sanding, the nature of the substrate for hardwood plywood, ambient conditions, compatibility of stains, sealer coats, and topcoats, contamination of airlines in pneumatic systems, and many others.
Ok, so how do I get a fine finish in the face of all these challenges?
For purposes of this discussion, we will limit the topics to two concerns: finish preparation and stain color/sheen selection.
Sizing and Filling
In a by-gone era, finishing was done in a much different way than it is today. Generally speaking, today's finishes are the result of a three or four, sometimes five-step process, including sanding, staining, sealing, sanding the sealer coat, and a top coat. For the most part, this creates an acceptable and often an exceptionally good finish. However, it's those times when these methods produce a finish that is NOT acceptable that can be very frustrating, leaving the finisher to try to determine the cause. More often than not, that cause is determined to be the surface quality of the wood part being finished. Surprisingly, I actually agree with this finding, but probably not for the reasons you may think. Finish preparation, a process that is sometimes incomplete, is crucial to producing a fine final finish, and that is where we need to look more closely.
Way back when, finishing usually started with either a wash coat (or glue size) or a fill coat, depending on the porosity of the species. A wash coat consisted of a highly diluted sealer compatible with the topcoat that was to be applied. Glue size, a solution of glue and water, could also be used. After this coat was allowed to dry, the entire surface was sanded just prior to the application of a stain. The wash coat had two benefits: first, it would raise the loose fibers on the wood surface allowing them to be removed during preparatory sanding, and second, it would serve as a filler in those end grain regions and figured areas.Once it was sanded, the loose and tight regions of the wood surface would be effectively neutralized so that a stain could be applied more uniformly, and subsequent top coats would not penetrate more deeply into the loose areas of the wood.
Immediately after the wash coat was sanded, the first coat of finish (usually a pigment or stain) was applied, followed by alternately sanding and clear coating until the desired result was achieved.
For the more open grain species like oak or ash, a fill coat was applied at the beginning of the process. This can be best described as similar to a film of diluted putty that would dive into the pores and vessel elements so that after sanding, the surface was uniformly smooth. Following the sanding of the fill coat, stains and finishes were applied with sanding between each application of finish material.
These methods required some trial and error on scrap pieces to achieve the desired color, smoothness, and sheen, but the end result was a flawless and deeply beautiful finish.
Stain Color and Gloss Levels
Hardwood plywood may be produced utilizing a number of materials for the substrate, including veneer core (sometimes called plywood core), and the engineered cores such as particleboard and medium density fiberboard (MDF). I am often asked which core is best, and I always respond, "depends on the application."

Where strength is an issue, veneer core has higher physical properties than particleboard or MDF. It has a very smooth surface and normally little thickness variation. However, it is a natural wood component, and as such some unavoidable attributes may show through the very thin decorative faces used today. Slight imperfections in the core surface, machine marks, and even the natural grain of the core may telegraph through the face and finish, particularly if the finish is a high gloss, or even worse if the finish is a high gloss over a dark stain. This finish virtually serves as a magnifying glass to highlight even the most subtle attributes of the core. Again, surface preparation is the key, along with selecting a satin or medium gloss top coat over a light color stain.
Particleboard and MDF may be a better choice in high exposure applications where strength is not so much an issue. Both have a very smooth surface, uniform thickness, and respectable physical properties. This makes them well suited for most finishes. However, even with particleboard and MDF, very dark stains coupled with a high gloss may and often exacerbate even the smallest imperfection in the core or face that may be present due simply to the very nature of wood as a raw material. More often than not, these imperfections defy detection until such finish is applied.
In closing...
A beautiful finish on a piece of fine furniture, millwork, or cabinetry is a marvel to behold. With the proper surface preparation, substrate selection, finishing materials, and finish application methods it is also achievable. The temptation to short cut any of these processes can and often produce less than satisfactory results and must be resisted whenever possible.
- Via the newsletter from our friends at Columbia Forest Products.
 Bradco Kitchens & Baths
BOOK AN APPOINTMENT